Project: 1979
Ford
Bronco
Status: Standby
ESC
Progress on this 1979 Ford Bronco
Ford 400 Modified Motor
NP 435 Transmission (Factory 4 speed)
NP 205 Atlas Twin Stick Transfer Case
American Autowire Classic Update Harness
Vintage Air Surefit A/C Kit
Custom Built and Integrated AMP Powersteps All the metal work, alignment, and gapping were done in-house, firewall has been filled and smoothed.
Along with building out custom mounts to run AMP power-steps.
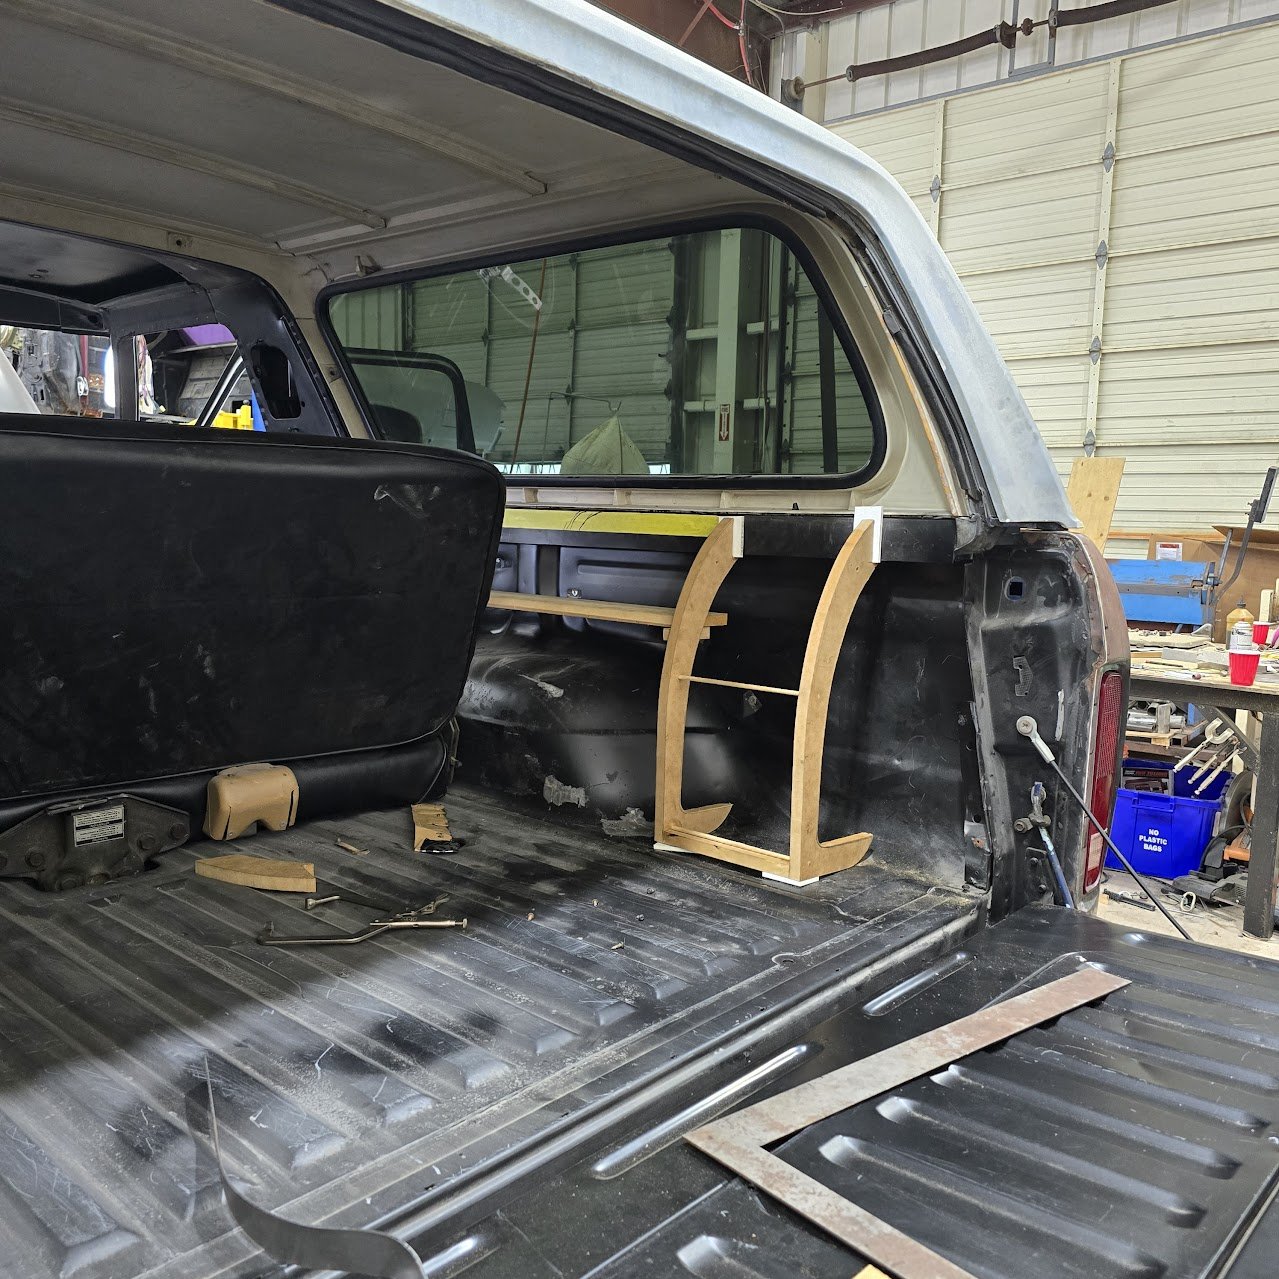
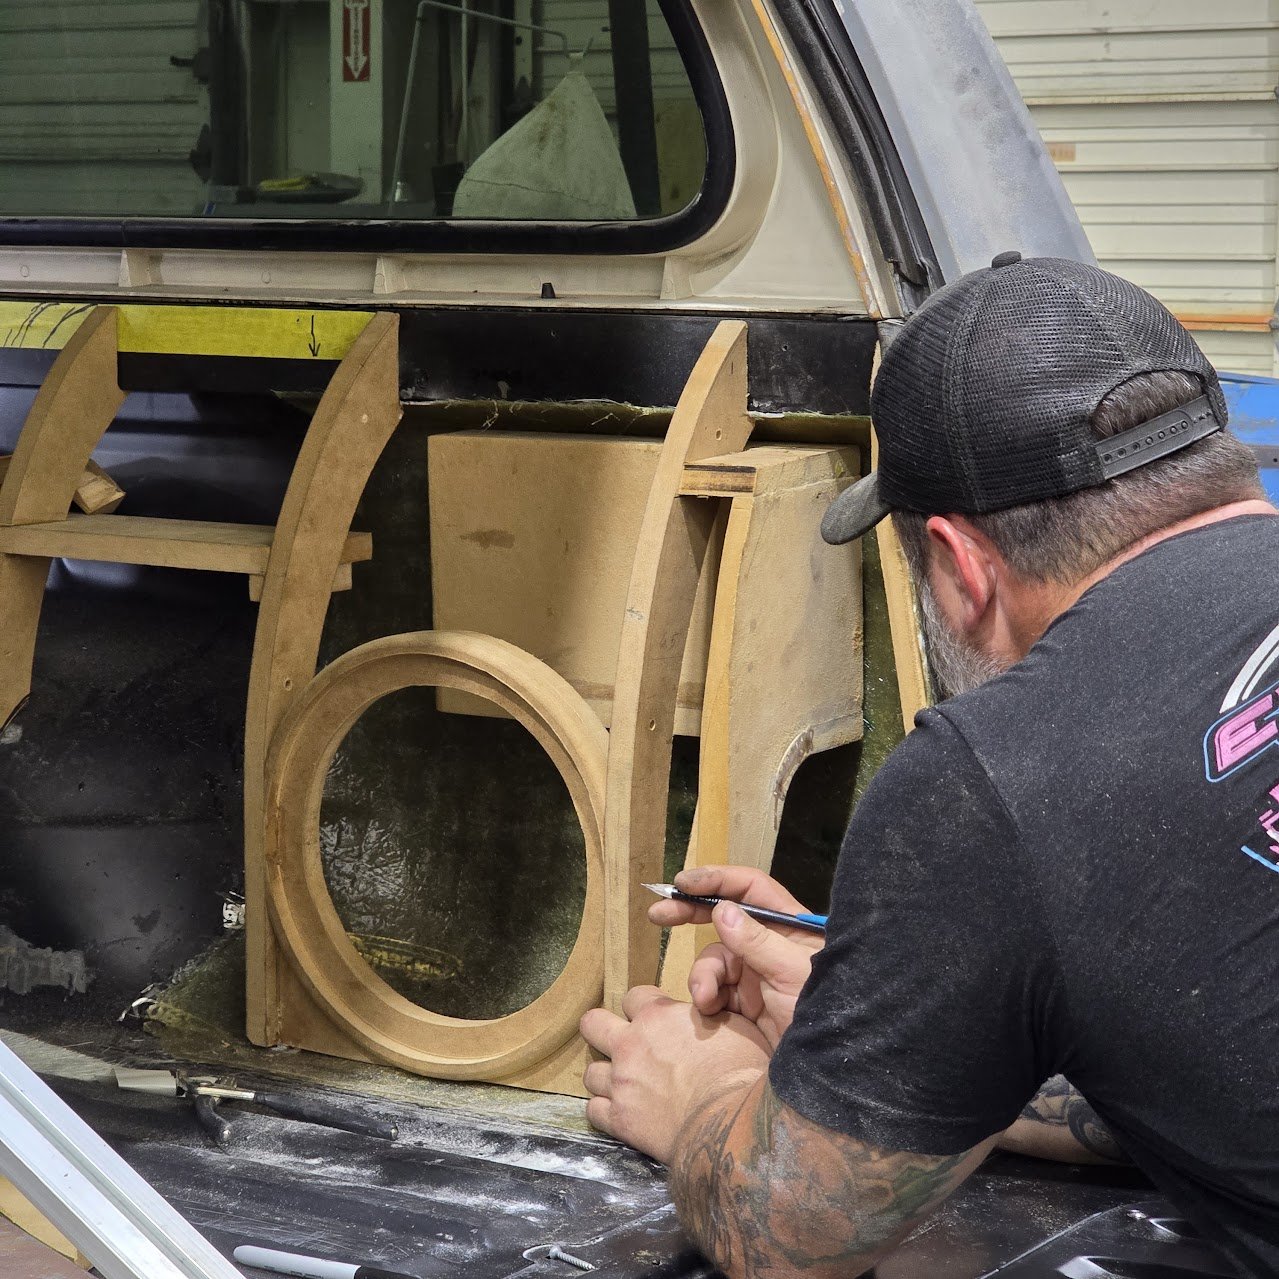
Currently in the process of building a custom interior for the rear that will house a hybrid subwoofer box, JL Audio speakers and subwoofer, and a hidden amp rack.
History
and Facts
Here are some facts about the 1979 Ford Bronco:
Body style
The second-generation Bronco was a three-door wagon with a lift-off rear hardtop.
Chassis
The Bronco was based on the 1973–1979 Ford F-100 pickup truck chassis, but was about a foot shorter and had a 104-inch wheelbase.
Off-road features
The Bronco had optional dual shocks for the front suspension, heavy-duty rear shocks, and front and rear sway bars.
Engines
The Bronco had two standard V8 engines, a 5.8-liter (351-cid) and a 6.6-liter (400-cid).
In 1979, the 351 gained 2 horsepower to 158 and the 400 lost 2 horsepower to 156.
Both engines had low horsepower output and poor acceleration for the size of the vehicle, and they consumed a lot of fuel.
Transmission
The Bronco had a three-speed automatic transmission and two four-speed manual transmissions.
Drive system
The Bronco had a part-time and full-time 4x4 system.
Interior
The front seats came in several configurations, including low-back bucket seats, a bench seat, high-back buckets, and captain's chairs.
The rear seat was flip/fold and could accommodate three people, and there was a footwell for added comfort.
Other interior options included sliding rear windows and a padded “GT” bar.
Other features
The Bronco had a power tailgate glass that could be operated from the driver's seat or liftgate area, and it offered five radio options.
Paint & Body
with Tyler
-
Finish body work and paint
Keep Original Blue Paint / Top White
Remove Antenna Fill Holes
Fill Cuts
Clean / Flatten Passenger Side Firewall
Repair Tail Gate Holes Caution With Tail Gate Switch
Addition of "1 touch" Up/Down For Tailgate Window
Fit / Fix Drip Rails
Remove Grease / Spray Undercarriage
Patch Tweeter Cuts in V Pillars
Shim Rear Axle For Pinion Angle (Need Block?)
*Needs Deflector* (Preferably Replacement for Original)
Additional Dash Holes to be Filled in When Interior Begins to Go Back Together
-
79 Bronco Drivers Side Hood Hinge
Part number: 40-3882
Qty: 1.00
79 Bronco Passenger Side Hood Hinge
Part number: 40-3883
Qty: 1.00
-
mocked up core support with body mounts
hung front fenders
mocked up grille
mocked up inner fenders
unpacked wiring
reran some wiring legs for cleanest and most hidden wiring possible in engine bay
researched and found parts missing/needed
-
raised core support at body mounts per factory style requirements to raise front of fenders
shifted fender forward a small amount and tightened in location
moved to the driver-side fender and swapped hardware
loomed, routed, and mounted wires going to front left lights and washer bottle
started running wires for knock sensor before running wires for engine and passenger side front lights
-
drilled hole for bulkhead in a hidden location
ran outer wires through bulkhead hole
started swapping fender fasteners for the correct style for vehicles like j clips
rehung passenger fender with proper fasteners
used shims for the front fender to find the most ideal depth by the door
inspected why the front fender sat forward-low
-
inspected and organized under-dash harness
mounted location to hold up wires under the dash with a nursery
mocked wire routing under the dash with zip ties
organized pieces for an electrical bulkhead for engine bay and front lights
-
added some holes in firewall pinchweld to mount wire loom clamps
loomed engine and FR lighting wires
ran engine bay wiring towards the passenger side against the firewall after adding and removing wires from the loom
opened up MSD 6AL-D box and planned box location
added mock battery
Installed MEGA fuze holder on the inner fender
-
ran and loomed MSD box wiring
added/modified holes in the inner fender to run wires through nicely
ran all wires through and added length to most to hide them properly in engine bay
added end for alternator cable and attached to MEGA fuzes
added ends to power harness and MSD
finish wired engine and ignition in engine bay area
organised all rearward wires to tail lights and fuel tank
loomed and ran wires going to rear through frame
opened up A/C system boxes and began mocking and planning
swapped over old power tailgate window switch to new Vintage Air controls
installed A/C condenser
Began mocking A/C evaporator/heater core
-
installed front grille upper supports
modified hood latch vertical support to make room for condenser
installed old grille loosely for Fender mocking purposes
continued mocking A/C condenser then removed
cut out crescent moon out of firewall where the old heater core would've been
measured, stenciled, and cut steel to fill the hole in firewall
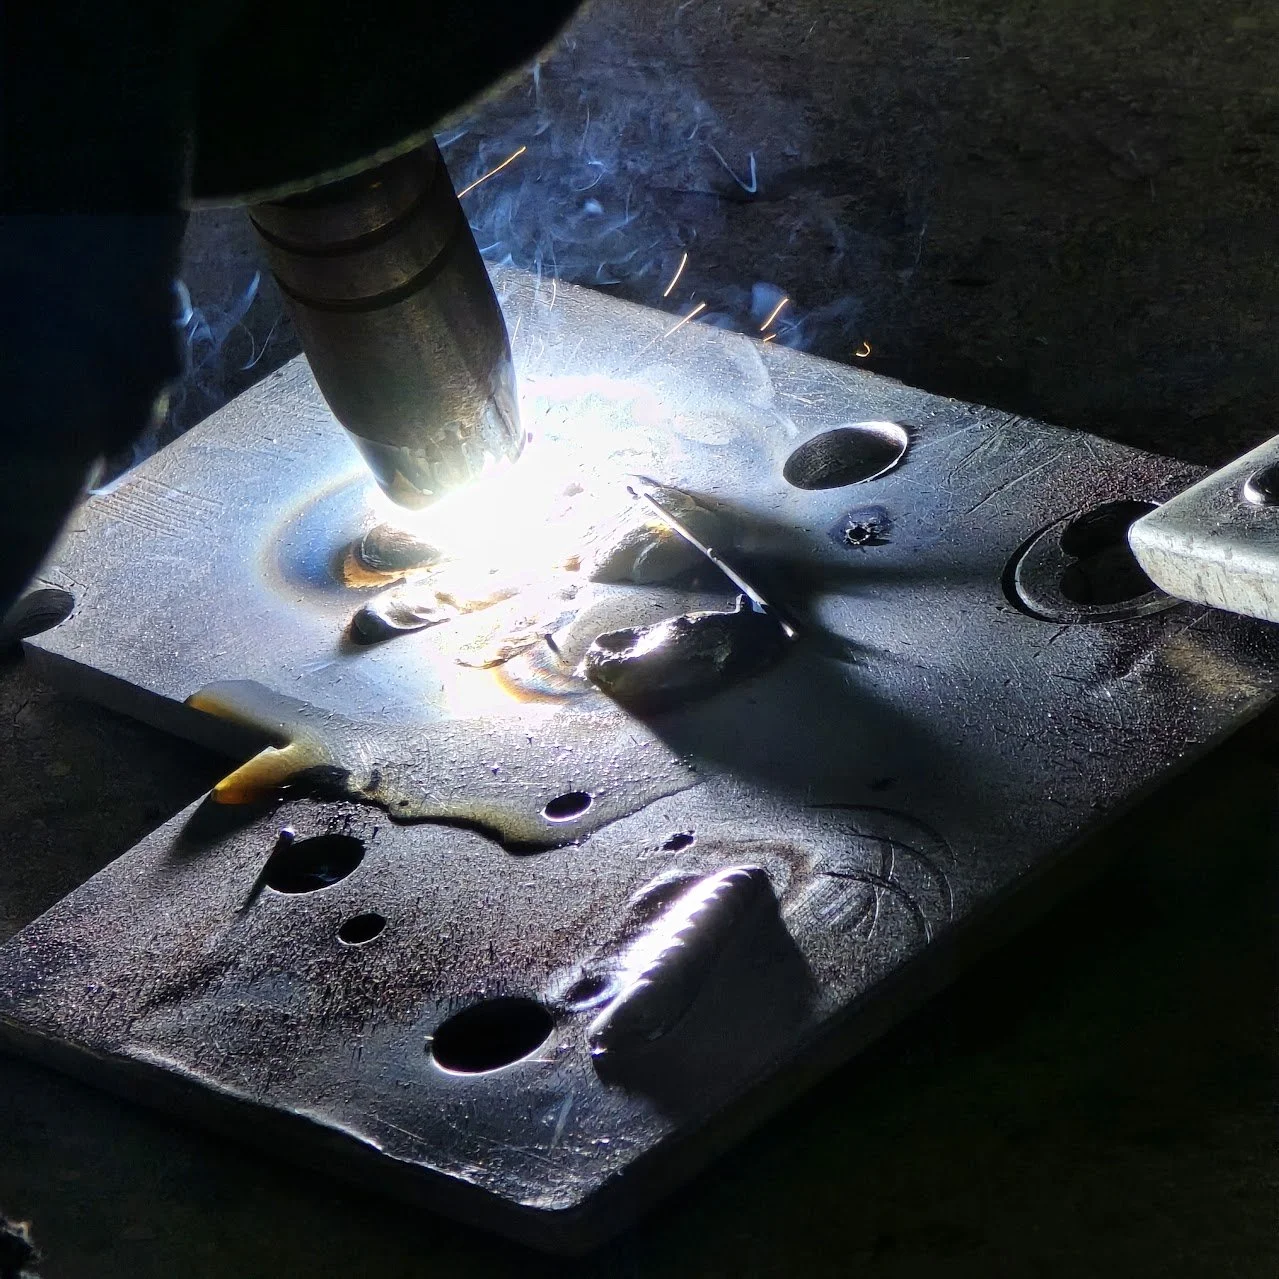
welded new piece in place and smoothed
Drilled holes for MSD box in flattened section
Drilled holes for vintage air condenser
Located other unneeded holes in firewall
shaved down old wiring harness pass through holes
Stenciled and cut new pieces out of steel
welded pieces in place and shaved flat
repeated the measured, stenciled, welded, and finished process for rest of unneeded firewall holes
continued wiring towards rear of truck
-
Finished wiring and routing towards rear of truck
Added individual power wire to fuel pump
Mocked locations for a/c lines in inner fender for looks and for servicability
Ordered ends needed for shortening lines in new locations
Ordered grommets for custom routing of heater and a/c hoses
Drilled holes in inner fender for heater lines and a/c
Removed passenger kick panel to add wiring holes for a/c and sound system in the near future
Ran and loomed wires for a/c controls and heater valve
Trimmed lines coming from evaporator box for proper fitment and mocked up to their respective locations
Adjusted the line lengths coming from compressor
Finish wired connections going to binary switch on drier that leads to compressor
Added mounts for a/c lines in inner fender to keep from vibrating, rubbing, or drooping
Reinstalled fenders
Reinstalled headlight buckets and grille hangars
Unpacked new grille and immediately covered in antiscratch material
Installed new grille and new clips with minimal modification
Installed old grille center
-
Researched and found what holes on inner fenders and core support that would be used and which won't be used
Marked and cleaned paint off of holes
Made mock plugs with cardboard for the larger holes where needed
Transfered cardboard templates to steel plate
Cut out rough sizes out of steel
Trimmed and fitted all plugs to their respective locations
Began welding plugs in place
Made cardboard templates for dash holes where needed
Transfered templates to steel and trimmed to fit as nicely as possible
Welded dash plugs in place
Smoothed plug locations on dash where vents would be for an accurate vent location cutout
Welded up small holes to the left of steering column location
Smoothed holes out left of the steering column and made sure that the surface wasn't warped at all
welded in plug next to cigarette lighter location
smoothed out and began heating and shrinking steel to ensure factory shape
-
Heated and shrank holes next to cigarette lighter location as nice as possible, bodying is required to make perfect
Finished welding holes on the driver's side inner fender including plug holes.
Started welding plugs on core support, finished welding and smoothing will be needed when the truck is taken down again due to proximity to other panels
loosened all bolts going to core support, front body mounts, inner fenders, fenders, grille, and cab
shifted fenders around to find a more ideal fit to the cab and grille
removed one washer from the passenger side core support mount and two from driver side to get front bumper line to match the grille
shifted all body mounts and tightened once the ideal location was found
methodically tightened all bolts once a more ideal fit was found to the front end
found factory-style dash vents (center and passenger side)
manually measured for factory vent location on passenger vent
transferred necessary measurements to center dual vent location for the most accurate cut
test fitted vents in the dash
cleaned threads for door hinges (door sides and body sides)
installed drivers and then the passenger door
minimal adjustment
installed hood and began adjustments
-
continued hood adjustments to find where rest of front end needs to shift and what modifications the hood needs to undergo
-
Checked body line and found it was off
Removed body mounts on passenger side and trimmed bushings until body line lined up from grille to taillights
retightened body mounts in place
Continued to adjust hood and found that passenger side nose needs to come back to close a gap between front of hood and grille
Loosened core support mounts
Removed passenger side headlight bucket
Loosened inner fender to firewall bolts
Shifted entire passenger nose back in one piece to close gap towards front of hood
Finished adjusting hood where needed
started moving MSD box to inside of bronco instead of on the firewall without interfering with heater/ac kit
Cleaned and welded 1/8inch steel rod to bottom of cowl and trimmed slightly (both sides) to extend it so the upper body line was coherent
Maneuvered cowl sides inward to keep the body smooth between door fitment and hood width.
Discovered original hinges are too far worn down (one inch of play side to side) the hinges cause the spring to contact inside of hood skirt. New hinges found
Began manipulating hood metal for ideal fitment to cowl
Cut spot welds at back of hood in order to push the outer skin down to better align with cowl
Began shifting hood skin down
-
cleaned paint off of rear passenger body between taillight and tailgate
welded 1/8 inch stainless rod to rear passenger tailgate To fill in gap caused by age and original tire carrier
trimmed rod to 3/16 gap top to bottom of right side tailgate
cleaned paint from drivers side rear tailgate gap
added 1/8 inch rod
welded in place and trimmed to copy 3/16 gap
added small portion of rod to bottom driver's side of tailgate to create a nice even straight line
trimmed bottom of tailgate rod that was added
smoothed both sides of tailgate gaps so it's ready for glazing and paint
cut away at back of passenger fender and tack welded to create a nice even gap after fitting front end.
tacked, adjusted, cut, and restacked specific spots to keep fender from warping
welded up gap that was cut
smoothed welds and added more weld where required
adjusted bottom corner of fender slightly to more align with bottom of door
adjusted bottom of door and top of fender to finalize the curve required for proper look and fitment
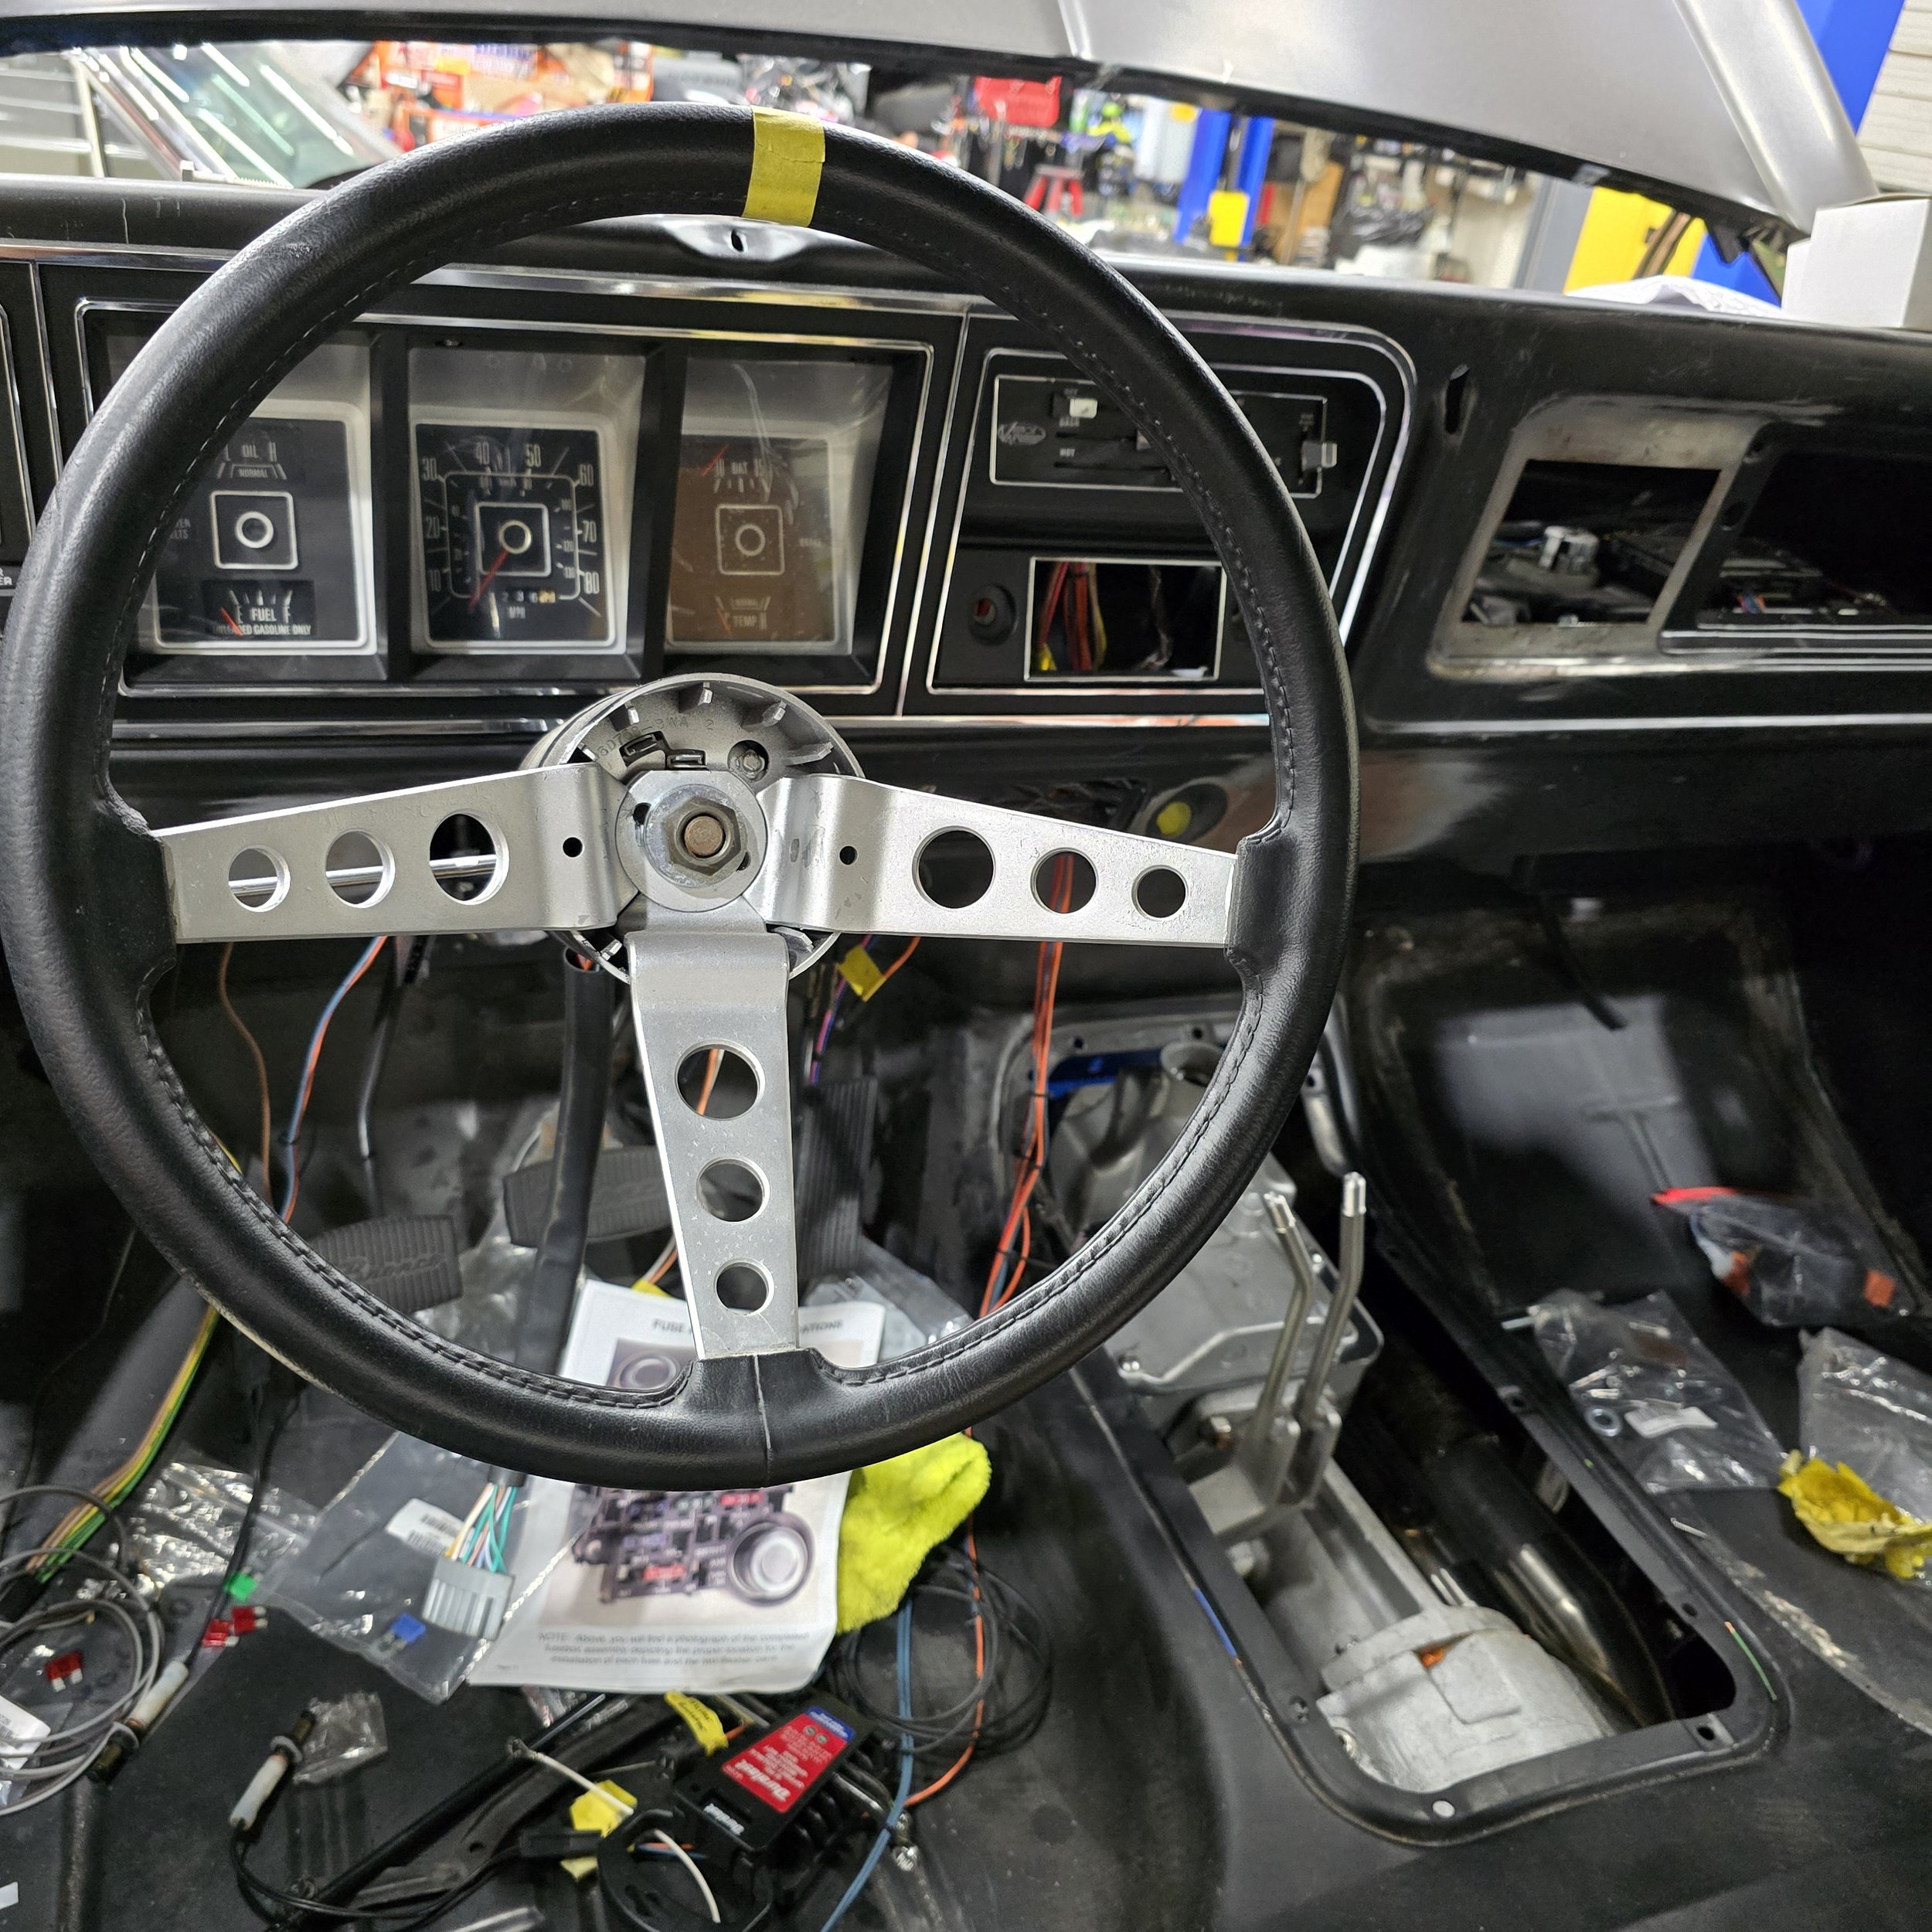
started making bolts to retain top of steering column to steering tube
-
removed bad replacement drivers side hood hinge
installed new replacement with much more success
trimmed holes on bottom side of hood hinge
adjusted hood to find the best fitment location
cleaned paint from drivers side tweeter hole
flattened and fixed metal to original curve
trimmed metal slightly
made a template and cut out new piece of filler steel
tacked in place
welded and smoothed surface
cut weld in one location due to metal not laying flush
used stud puller and hammer to get the sheet metal to line up
rewelded and smoothed
cleaned off passenger side tweeter hole
flattened steel and made a plug
tacked and welded in place with no issues
smoothed welds
Mechanical Labor
with Tyler
-
Replace Actuator (CSP)
OEM Gauges
Speedo Gear Color??
Haymaker Restomod AC Unit Install
Holley Oil Pressure Sensor w/ Relay to be wired
Knock Sensor needs to be Wired to a Light
Flush & Pressure Test Fuel System
Plumb Rear Brakes
Clean up under hood (Does not mind seeing hoses)
Specific Dipstick Install Protocol
Power Locks
Power Windows
Alarm System w/ Remote Kill
Replace Windshield
-
located passenger rear flexible brake line that goes to caliper and installed
custom modified rear axle brake lines to fit flex lines
tightened rear brake lines and check fittings for rest of system
located brake booster
installed fuel tank rubber hoses and filler neck
checked fuel system fittings for tightness
wired in gauge set
fitted and installed gauge set
installed ignition switch into dash while swapping old lock cylinder to retain original key functionality
located missing small parts that are needed to order
fiilled oil filter with oil and crank case per engine builders notes on engine
Installed dipstick
mocked up steering column and found any missing parts
Finish wired front marker lights
finish wired headlights
assembled electric fans to shroud and prepped to be wired into fan controller
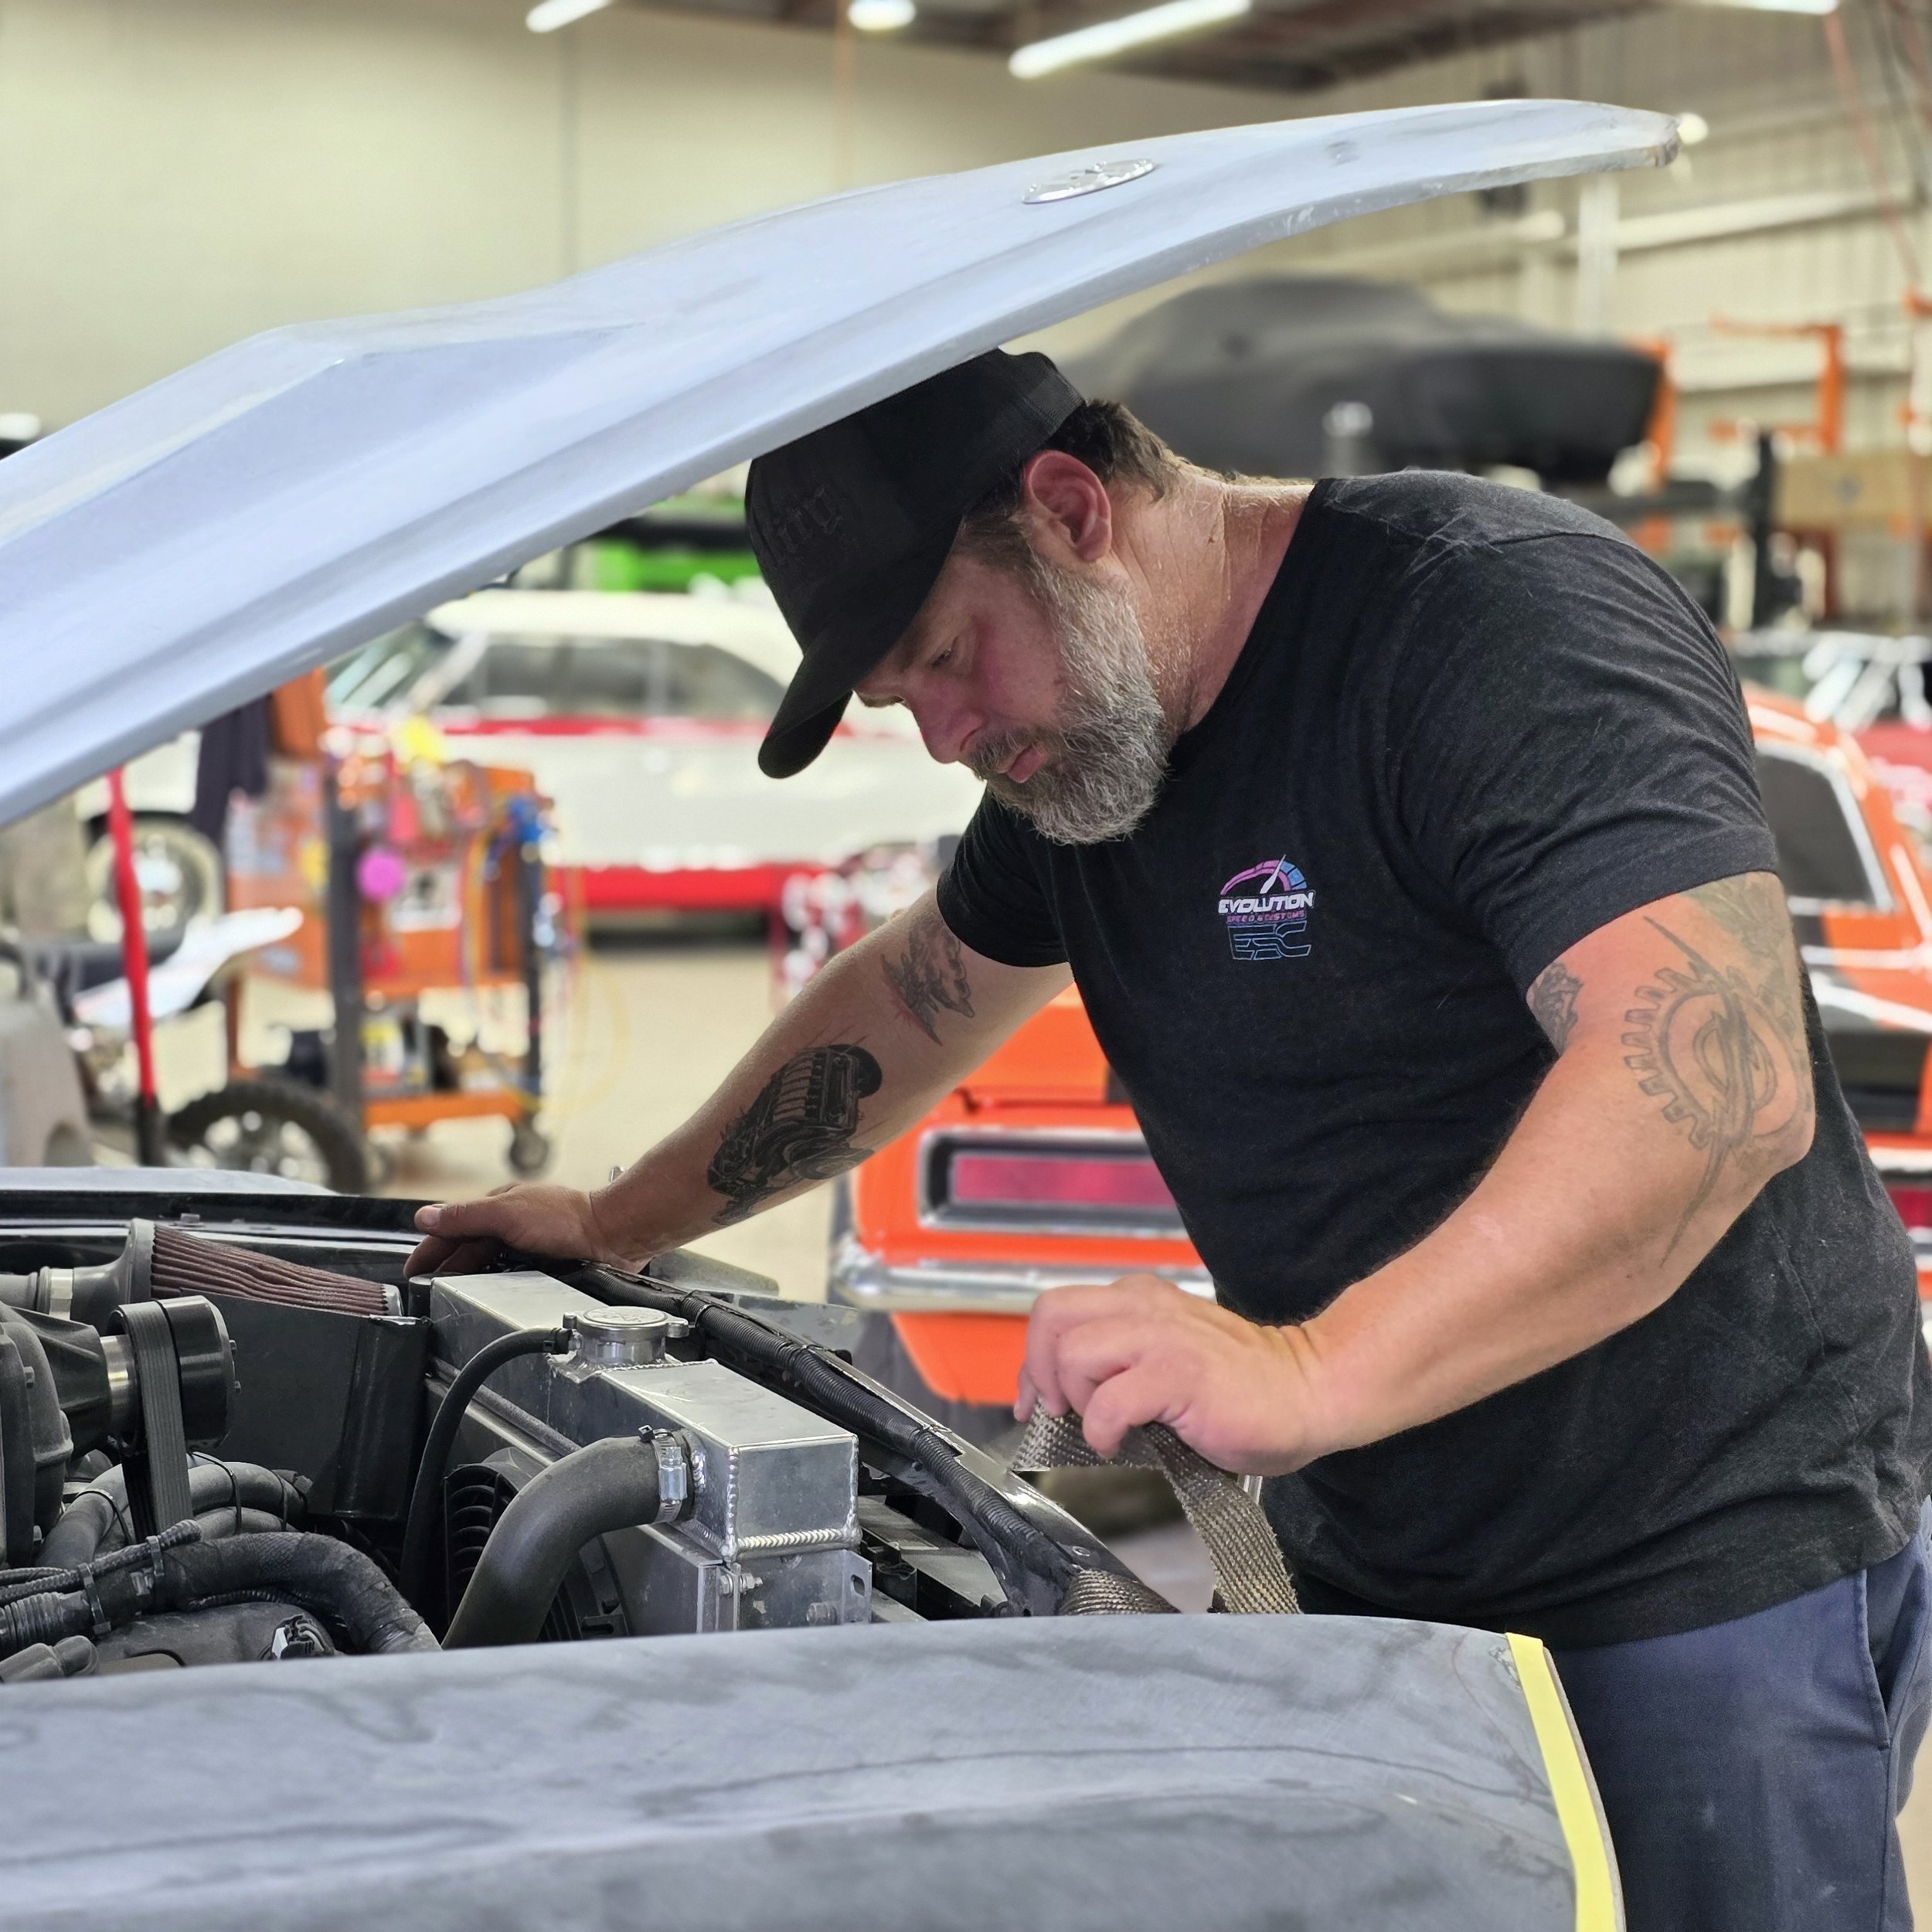
installed fans and shroud onto radiator
started to finish wire engine bay including starter solenoid
-
Routed main power and ground cables from battery to engine, engine to frame, frame to body, from battery to starter, and from battery to main fuze block
fabricated A/C soft line bracket to keep A/C lines away from alternator and A/C belt tensioner
measured for proper V-belts for A/C and Alternator and ordered
installed V-belts
ordered brake booster
installed lower radiator hose, upper hose did not fit properly so found and ordered one that will fit better without risking the hose popping off the chrome thermostat housing
searched for any pieces needed for clutch setup and added to need to order list.
added brake pedal plastic bushings to brake pedal shaft and adjusted where necessary.
couldnt find or source the clutch lever that bolts to the end of the clutch pedal shaft so one was fabricated and painted
sized new stainless clutch rod with hyme joints to factory length to ensure proper adjustment and movement
installed clutch rod from pedal to clutch Z bar.
-
Sandblasted factory throttle pedal rod
painted in satin black and reassembled with supplied new throttle pedal and spring
cleaned and painted factory throttle cable and installed assembly
installed new thermostat housing and upper radiator hose
added gear oil to the rear axle, transfer case, transmission, and front axle
found that the transmission had a bad leak at the passenger PTO cover
removed, cleaned, and resealed PTO cover
cleaned, painted, and installed new brake booster
cleaned, painted, and installed master cylinder to booster
sandblasted and painted tailgate spring retainer plates and installed spring
installed tailgate on the truck
adjusted tailgate and marked where the body was off
shaped rear passenger upper corner to match the tailgate and driver-side
wired knock sensor into the cab
wired reverse light switch with new plug
replaced oil pressure sender to the correct factory replacement and wired
-
marked current location of distributor and rotor to make sure timing is exact on reinstallment
removed passenger side valve cover to see when oil reaches valvetrain
primed oiling system as a precaution after engine has been sitting for an extended period of time
reassembled engine (valve cover and distributor)
hooked batter up to wiring harness and added needed fuses to fuze block
uncovered carburetor
added 5 gallons of fuel to fuel tank and tested fuel system
tightened one leaking location
attempted to test fire but found that supplied installed starter was a dud
retrieved correct 7/16 tube nut for forward most master cylinder location
bench bled master cylinder
installed MC back on truck and hooked up lines
let brake fluid gravity feed to all calipers
tightened a multitude of loose brake line fittings
bled brake system with installed easybleeders
drilled holes in nose of truck for clinkos for easier and accurate reassembly after paint including fenders, hood hinges, and forward fender brackets to core support
installed clutch return spring
disassembled supplied factory steering slide shaft
sandblasted and repainted
reassembled, greased, and installed slide shaft with new borgeson u-joints
finished a multitude of small mechanical details under the truck including fixing small leaks in diff covers, new bolt for rear sway bar, e-brake cables adjustment and small parts painting to prevent rust
-
installed new starter and found that the engine was locked up
tried turning at crank and flywheel but was solid
pulled all spark plugs to inspect if it was hydro locked or rusted in the cylinders. Inside the cylinders looked pristine
drained oil and snaked a bore scope into the oil pan to see if there was a mechanical blockage or rust internally and internals looked pristine as well
pulled driveshafts
removed transfer case linkage
removed transfer case
removed transmission mount, transmission, and transmission extension
tested transfer case and transmission, both were perfectly fine
pulled bellhousing and found that the bellhousing was contacting the new Centerforce flywheel firmly in three locations due to the ring gear being located further back
removed clutch pack and flywheel to inspect if it was a manufacturing or fitment error.
used a die grinder and carbide to shave away the bellhousing bosses that were contacting
test fitted and tried to turn the engine over via the crank bolt
removed bell housing and shaved more, test fitted, turned and repeated until enough material was removed to properly clear bellhousing
reinstalled bellhousing the final time and hooked up clutch pedal rod
reinstalled transmission
reinstalled transmission mount
cleaned and resurfaced transfer case mounting surface including smoothing some of the cast iron around transfer case mounting bolt threads that pulled out slightly to avoid a fitment error leak
reinstalled transfer case and linkage
reinstalled driveshafts
tried to test fire and found that firing order and #1 wire location was incorrect
found top dead center and continued normal steps to setting spark plug wire locations
tightened one AN fitting for the fuel line and test fired. Ran and idled almost immediately
-
adjusted chrome grille tabs to mount front markers correctly
found best location for knock sensor light
drilled and finished hole in dash for knock sensor
cleaned off black anodized knock sensor light cap for it to be painted body color when the truck gets painted for the best factory astetic look
wired knock sensor and tested
unpinned factory style blinker switch plug and adapted Ford blinker switch to gm style ribbon column plug supplied on wiring harness
tested all lights for functionality including blinkers, markers, and 4way
Mechanical: Electrical
with Tyler & Chris
-
CSR supplied American Auto Wire Harness Install
Stock Gauges
The truck will have a Retrosounds radio, door speakers, rear seat speakers, and subs in the back quarters, 2 amps.
The truck is going to be running a Resto-mod air AC system
No EFI on this truck
Power Windows!
Power Locks!
Alarm System w/ remote kill
Amp Steps
-
modified new battery box to fit in auxillary battery location by cutting spot welds out, mocking up, and plug welding
sandblasted and painted to achieve even and clean finish
mocked mock battery to aux location and planned cable routing
made battery cables and clamped out of view under core support
installed new headlight switch nut and mocked up
modified dash so switches exit their proper locations through plastic dash cover by cutting and welding
-
assess installation and length of amps steps needed.
Max length 60"
Same mounting style as the F-250
Mechanical: Power Steps
with Chris
-
Fabricate and wire the powered steps
-
Fabricated mounts for passenger side step.
Mocked up a step and started shimming for even closure
-
Built out passenger side brackets, and removed old plating left on inner rockers.
Welded in the rear bracket and squared to the body.
Built out a lower structure for the front mount and mocked up the bracket. Tacked in the bracket to check closure.
Started welding in the front bracket and found corrosion below the top layer of the rocker.
Pulled the Bracket back off. Addressed corrosion and re-tacked in the bracket.
Closure of the Step is now lower on the front after. Cannot move the bracket up any further and will have to address it with the rear bracket.
Welded in the front bracket and re-assembled step.
started assessing the modification of the rear bracket.
Fabrication
with Tyler
-
Exhaust - Crossover - V Band 2 into 1 up & over Axle
Weld on Axle Tabs
-
used the other halves of the v-band clamps supplied for header collectors
fabricated passenger side and driver side header tubes to connect to one slip-on Y-pipe 2-1 collector
found a more appropriate muffler (Borla brand 1 in and 1 out)
installed a Vband clamp after the Y-pipe collector and attached it to the muffler side
extended exhaust up and over the rear axle and installed another Vband clamp
added hangar from muffler to body
added hangar from exhaust over the axle to the body
added hangar in the center of the exhaust system to frame cross-member
continued exhaust as far away from the empty cavity under the rear seat as possible while still staying mostly hidden
removed exhaust system and added header heat wrap around "Y-pipe" from the driver side and passenger side header collectors to protect the firewall, floor, and wiring, and to keep from heating oil in the oil pan
reinstalled the entire system and balogna cut tailpipe
Parts List
[PART]
[PART NUMBER]
[QUANTITY]
79 Bronco interior dash screws
40-0523
15.00
Notes: interior dash screws gone or missing, cannot be found
79 Bronco interior dash j-clips
30-0829
10.00
Notes: some clips we have but not enough
79 BRONCO MASTER BODY BOLT KIT
78B-M
1.00
79 bronco steel grille surround (chrome finish)
49-8941
1.00
Notes: needed due to the original being dented in multiple complex curve locations
79 BRONCO FR SPLASH SHIELD
49-7999
1.00
79 BRONCO FL SPLASH SHIELD
49-7998
1.00
79 BRONCO REAR SPLASH SHIELD
49-8000
4.00
Military Style Battery Terminal Ends
PCO-0810PT
1.00
79 Bronco XS Power Battery D4800
XSP-D4800
2.00
Vintage Air #10 90 Bulkhead Fitting
VTA-35883-VUG
1.00
Vintage Air #6 90 Fitting
VTA-35831-VUG
1.00
Vintage Air Grommet
VTA-33137-VUI
7.00
Vintage Air #10 To 5/8 12" heater hardline
VTA-12412-VBH
2.00
79 Bronco headlight switch nut
40-0924
1.00
79 Bronco wiper switch knob
40-2534
1.00
79 Bronco Firewall to Steering Column Seal
45-0230
1.00
Notes: This is the more 3-dimensional seal, not the gasket
79 Bronco Right Front Marker
47-4117
1.00
79 Bronco Front Left Marker
47-4116
1.00
79 Bronco Clutch Pedal Assist Spring
40-3202
1.00
79 Bronco Clutch Spring Insulator
40-3225
1.00
79 Bronco Battery Tray
49-7520
1.00
Borgeson Dampened 3/4 DD+36 Spline Steering Ujoint
BRG-163449
1.00
Borgeson 3/4 DD+36 Spline Steering Ujoint
BRG-123449
1.00
Fuel
93 by the gallon
5.00
Tube Nut
1.00
Amp Research Power Steps
76235-01A
1.00


