Project: 1969
Chevrolet
Camaro
Status: Completed
History
The 1969 Chevrolet Camaro was the most popular year for the first generation of Camaros, with over 700,000 built.
The 1969 model had a redesigned exterior with new sheet metal, deeper headlights, and a heavy V front grille. It also had squared-off fender tops and a trailing crease in the body line.

What did ESC do exactly?
- Hot cam LS3 custom in house tuning
- Hooker headers
- Aeromotive phantom in tank pump and regulator
- 2much charcoal canister
- Custom hidden fuel tank
- Shaved and smoothed firewall
- Mini tubbed
- American powertrain TKO 5 speed
- Fully built 12 bolt with 3.73
- Baer brakes
- Full custom stainless steel exhaust with hooker VR304 mufflers
- Borgeson steering box
- Hydratech hydro boost setup
- Custom built intake and box
- PWR radiator with dual fans
- Full RideTech suspension with coilovers front and rear
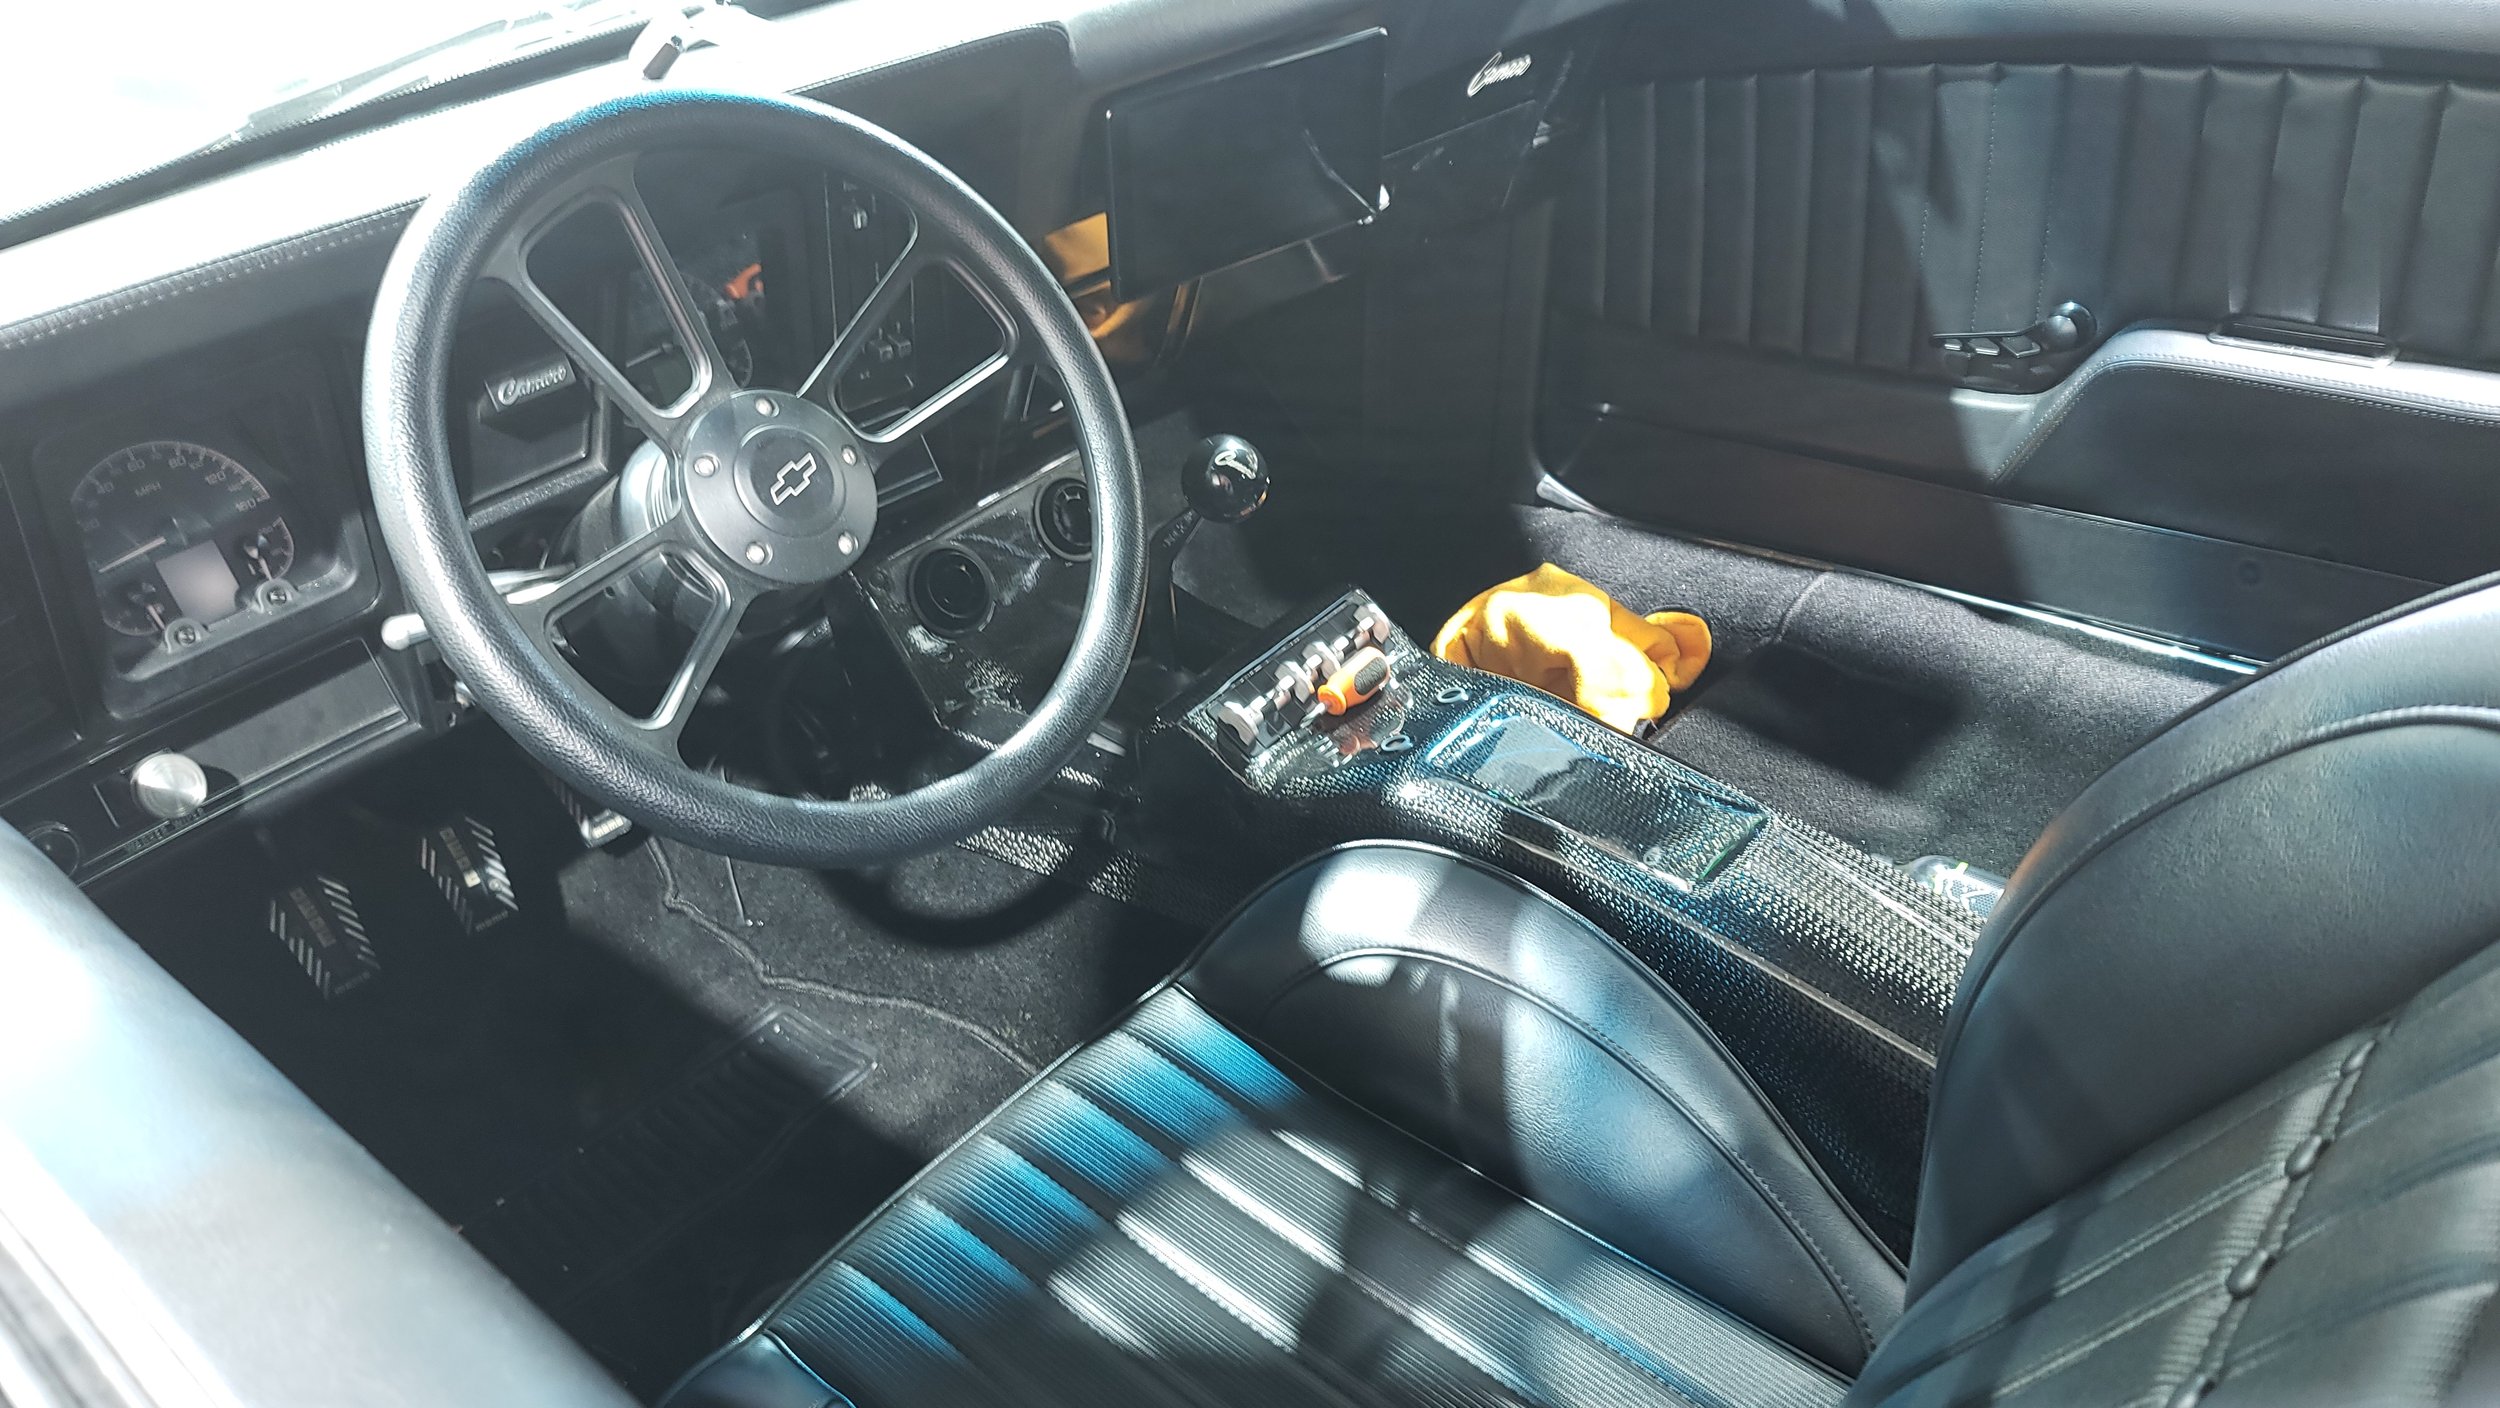
- TMI interior
- Custom carbon fiber center console with Watson Street Works switches
- Dakota digital gauges
- Vintage Air
- Complete Dynamat inside
- Full JL audio system, C3 fronts and C2 rear 10W3 JL 900/5
- Pioneer halo unit
- Fesler flush glass front and rear
- Shaved drip rails
- Shaved and smoothed door handles
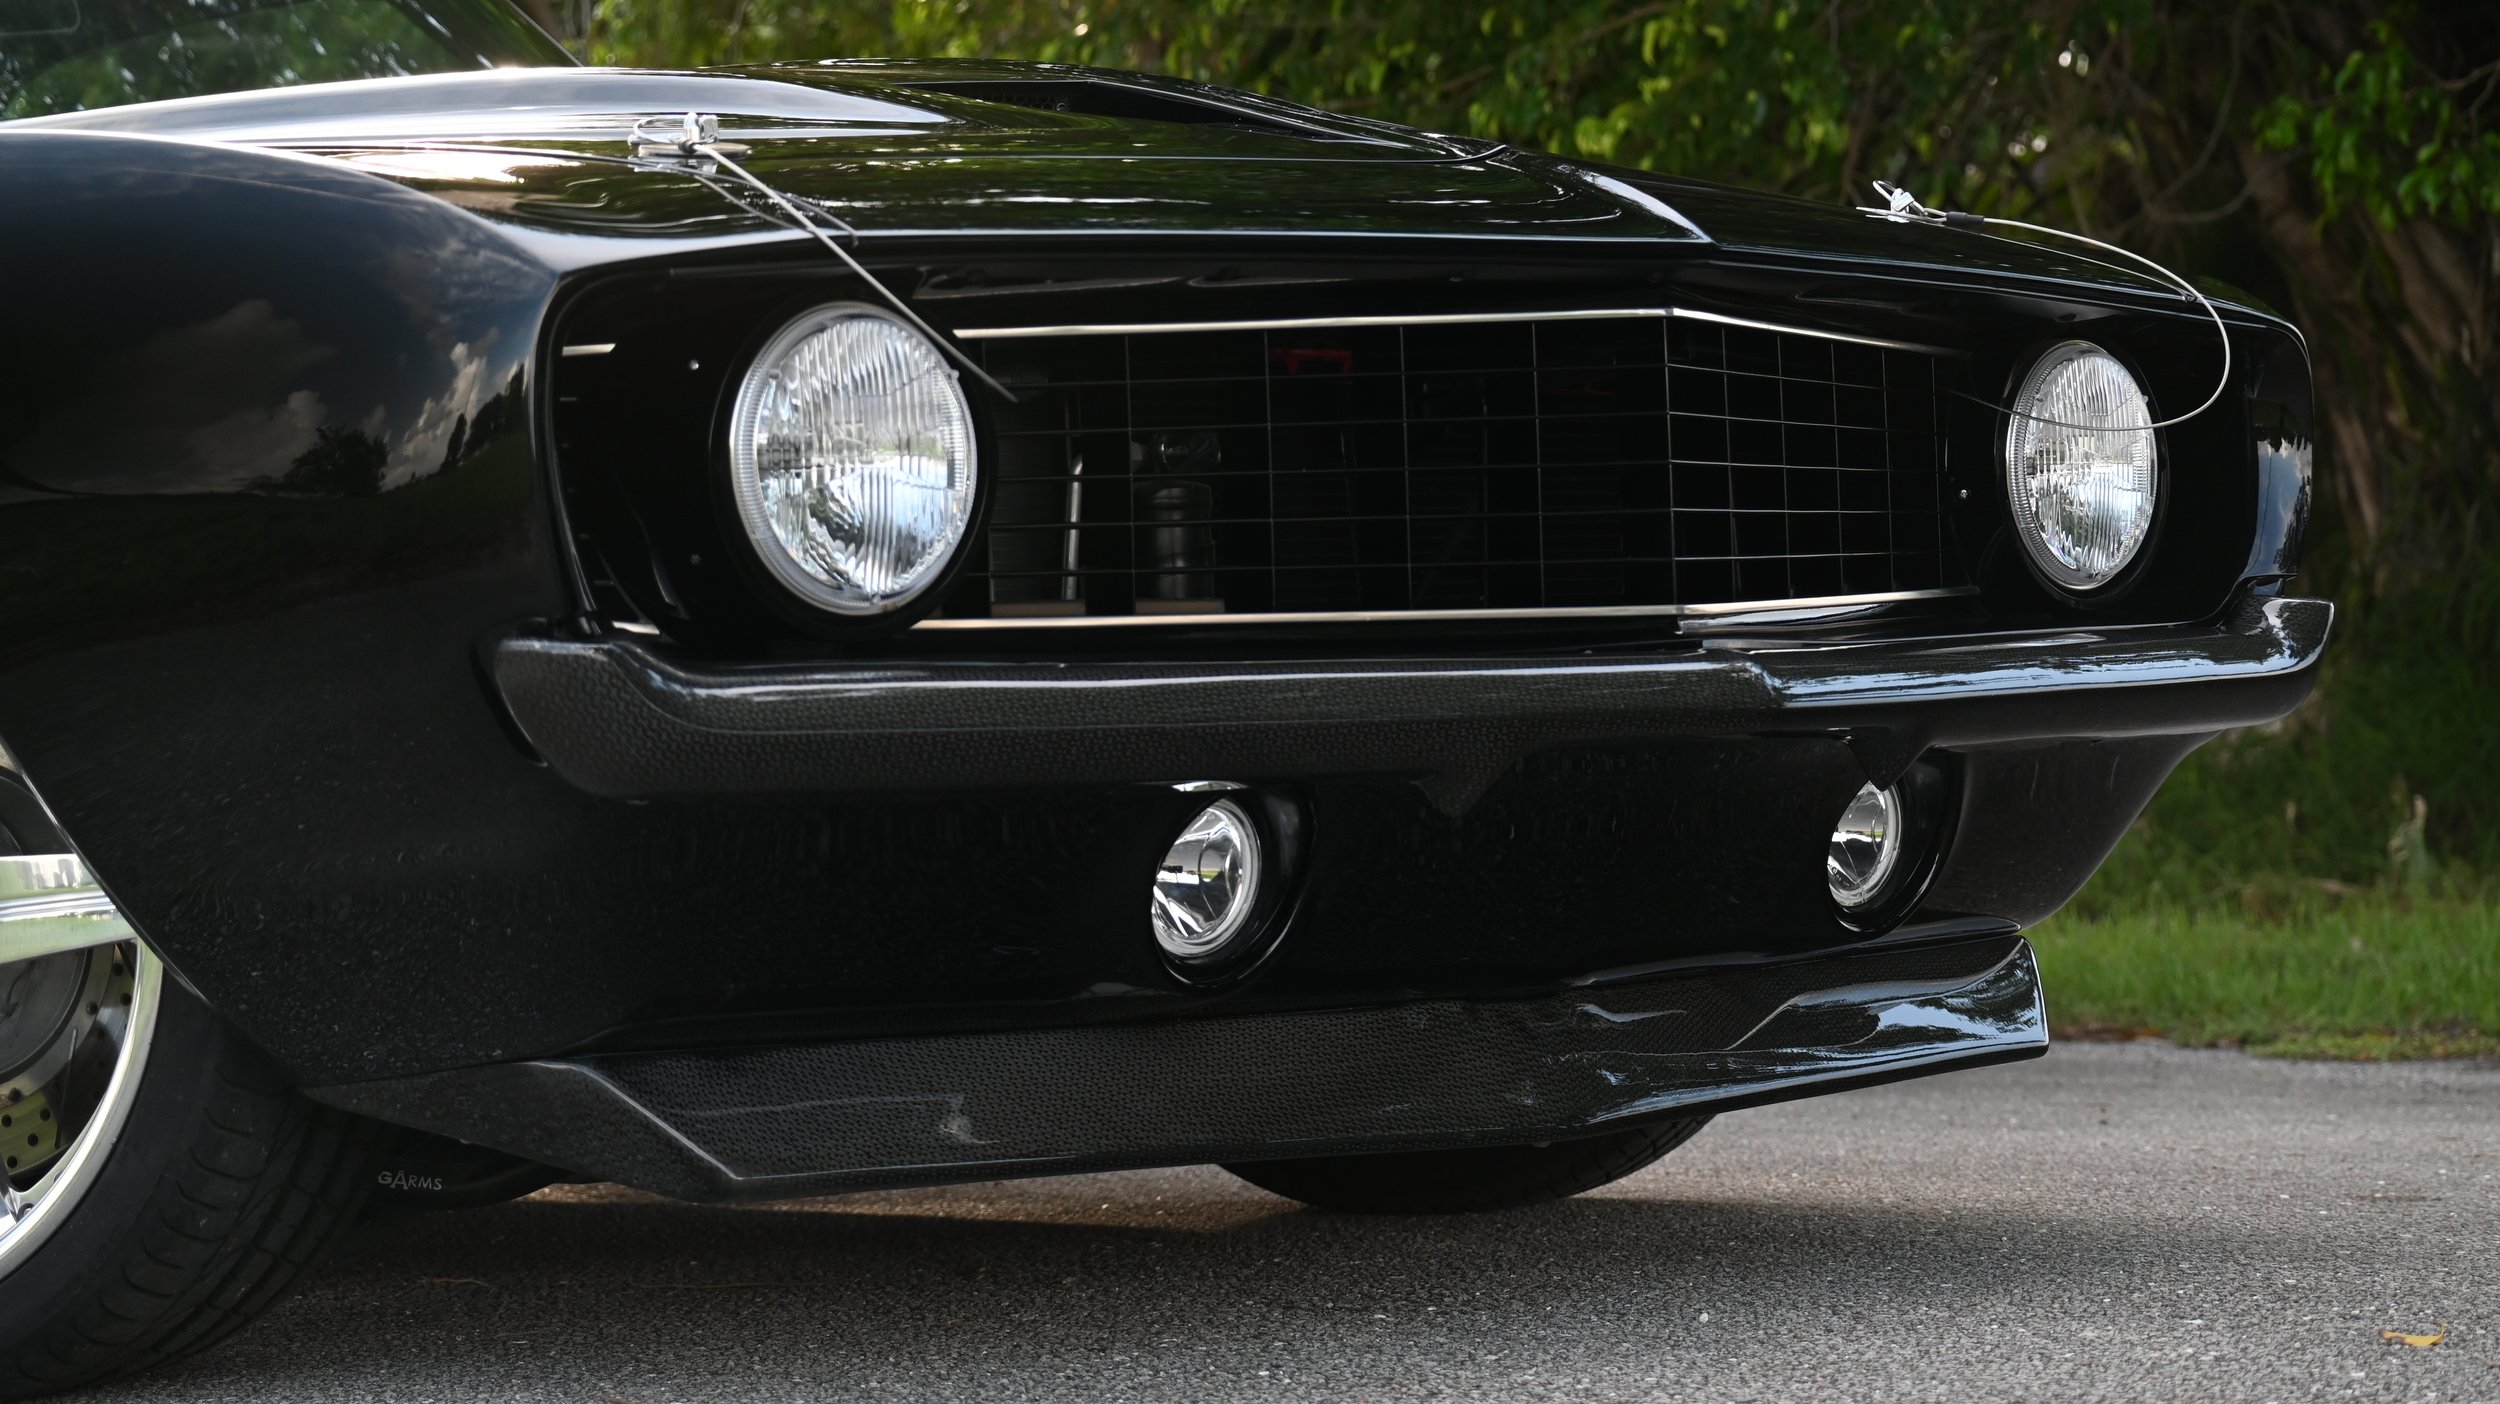
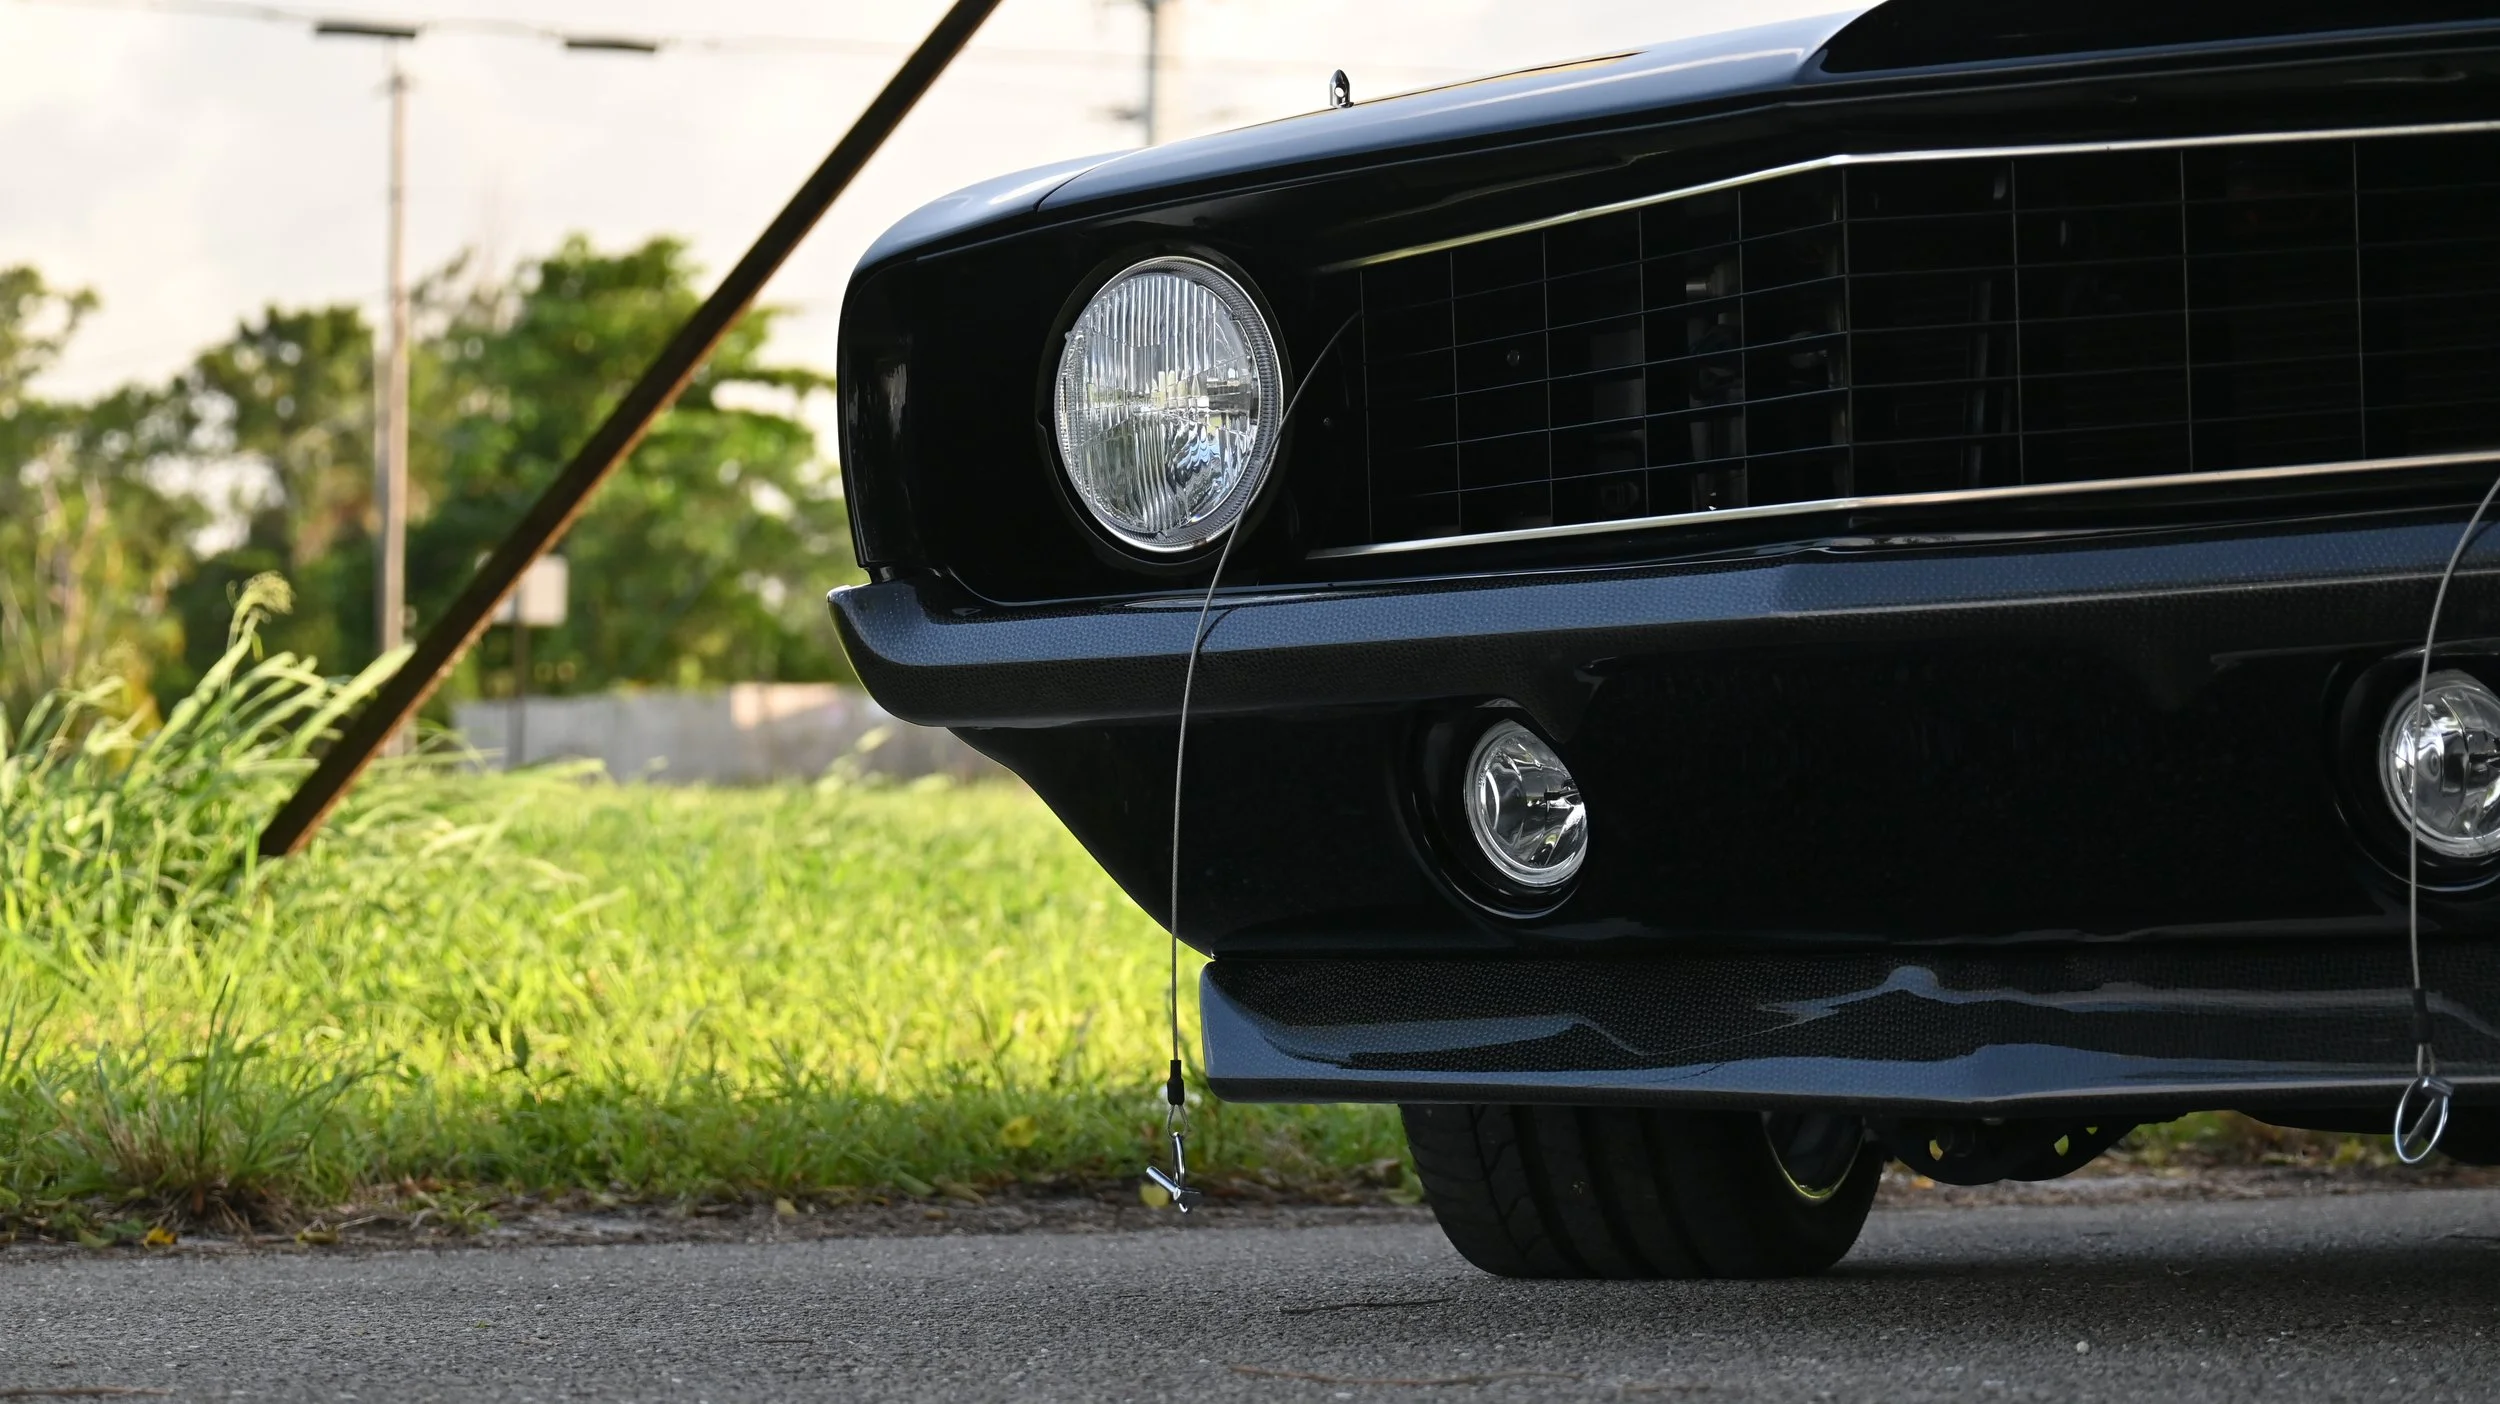
- Holley headlights
- Carbon fiber bumpers and custom carbon front lip
- Deep Black paint PPG
Carbon fiber bumpers and custom carbon front lip
Facts
Here are some facts about the 1969 Chevrolet Camaro:
Engine
The 1969 Camaro had 12 different engine options, including a 302 cubic inch (CID) OHV V8 engine with 290 horsepower at 5,800 RPM and 290 ft-lbs of torque at 4,200 RPM. However, some say the engine produces over 375 horsepower at 7,000 RPM and over 330 ft-lbs of torque.
Transmission
The 1969 Camaro had several transmission options, including a two-speed "Powerglide" automatic, a four-speed manual, and a three-speed "Turbo Hydra-Matic 350" automatic. Six-cylinder models also had the option for a semi-automatic "Torque-Drive" two-speed transmission.
Performance
The 1969 Camaro Z/28 has a 0–60 time of 7.4 seconds and a quarter mile time of 15.12 seconds at 94.8 miles per hour, with a top speed of over 135 miles per hour.
Dimensions
The 1969 Camaro is 16’2” long, 6’2” wide, and has 5” of ground clearance. It also has a wheelbase of 8’12”.
Interior
The standard interior has vinyl-covered cardboard door panels with padded armrests. Custom interiors may have the armrests molded into the panels.
Other features
The 1969 Camaro may also have optional features like an RPO D33 remote-controlled left-hand sideview mirror.
100% Guaranteed to raise Testosterone levels


Paint & Body
with Jio
-
hammer and dolly the inside of the right fender to sort out the buckle
valley out multiple cracks in the right fender
knocked down hard edges with 80 on the DA
valley out cracks on the left fender
knocked down the hard edges with 80 grit on the DA
tight wiped the feathered cracks on both fenders with reinforced filler
cut filler with a cheese grater
blocked the filler on both fenders with 40grit
blocked 40grit with 80 grit
spread body filler on the right fender
cut filler with a cheese grater
blocked body filler with 40-grit
blocked 40grit with 80 grit
tight wiped the fender with polyester glazing putty
grind down the remains welds from the spoiler on the right corner
-
finished up the grind
knocked down hard edges with 4 on the DA
sanded the area in Prep for filler
spread reinforced filler on the bottom of the lower valances
cut reinforced filler with a cheese grater
sanded reinforced filler with 40 on the DA
spread body filler on the bottom of the lower valance
cut the body filler with a cheese grater
started to sand the body filler with 40 grit on the inline sander
-
removed front bumper
finished remove the bulk of the filler with the inline sande
sanded the smaller sections with 40 grit in the DA sander
started blocking the body filler to rough up the shape
-
spot filled a few spots that remained low
blocked the spots with 40
blocked the spots with 80
wiped polyester glazing putty
quickly blocked the polyester glazing putty with 40 to get the rough shape
-
filled a couple of spots that were still low with polyester glazing putty
blocked the spot wipes quickly with 40-grit
blocked all the glazing putty with 80-grit
hammer and Dollied a big dent next to the fog light
sanded the repair with 80 grit in prep for filler
wiped repair with body filler
blocked the repair 40 grit, then 80 grit
wiped the repair with polyester glazing putty
knocked down the ridges with 40-grit
blocked the putty with 80-grit
blocked all repairs with 120-grit
started detail sanding a few recessed areas to finish up the repair. The final stage of the filler work, then primer.
-
finished up the detail sanding on the recessed areas
sanded around the repair with 180 on the DA sander
sanded around the 180 grit with 400 grit to finish off the repair
went and hand sanded the edges and remaining shinny spot
gave the repairs a quick blow off and wipe with a dry rag to remove dust
cleaned the repairs with wax and grease remover
started outlining the repairs with tape in prep for first rounds of primer
-
finished outlining the repair with tape
swept the floor so tape can stick
bagged off the vehicle with plastic to protect from overspray
taped the plastic to the floor to prevent overspray creeping from underneath the vehicle
cut the repair out of the plastic
wiped down repairs with wax and grease remover
applied 3 coats of super high build primer
-
went around and spot filled the pinholes that didn’t fill with primer
shaved Down the filler and specs in the primer
blocked primer with 180
blocked primer with 320, then 320 on a soft block
blocked primer with 400, then 400 on a soft block
-
removed bumper brackets
went around and did the detail sanding. Around the fog light the inner fender lip etc.
sanded the repair with 400 on the DA
cut the fenders out of the plastic
taped the leading edge of the door and hood to prevent scratches
sanded bother fender with 600 on the da
sanded both fenders with 600 on an interface pad
gave the vehicle a quick blow-off and wiped down with a dry rag to see areas I didn’t get
scotch brite by hand the remaining shiny spots
-
grabbed front chin spoiler
bolted up spoiler
measured for stretching the spoiler
measured and marked the spoiler
cut the spoiler into three pieces
measured and marked the filler panels
cut the filler panels to size
bonded the filler panels to the left side
made a couple bends and trimmed them into place for the radiused corners
started bonding the filler panels to the right side of the spoiler
-
Finished bonding the right side of the spoiler
made a couple of bends and trimmed them into place for the radiused corners
sanded the areas that stretched to make everything level
made end caps for both sides of the spoiler so the spoiler can wrap around the corners
sealed off the edges so I can wax the spoiler
-
Removed clamps
removed spoiler from vehicle
trimmed back the excess fiberglass
applied 4 coats of wax to the parts of the spoiler that I couldn’t reach/was difficult when it was attached to the vehicle
glassed a layer over the parts the I waxed
let the first layer kick
glassed a second layer
removed clamps
trimmed back any excess fiberglass
popped the spoiler form the mold
filled a few small gaps with glue
shaped the few small spot
filled a bigger gap with polyester filler
-
blocked the filler
filled 5 more areas I thought would cause issue later down the road
blocked the other areas I filled
blew off and wiped down part with dry rag
clean with wax and grease remover
applied 4 coats of wax
measured mold and cut carbon to length
fit the carbon on the mold and trimmed the major excess off
laid the carbon in the mold
mixed and pour the resin onto the carbon
-
shaved down the last little spot fills on the spoiler
blocked the areas that I shaved with 180
blocked the 180 scratches with 320
blocked the 320 scratches with 400
blocked the 400 scratches with 600
buzzed the spoiler with 600 on the DA sander
sanded the edges with a sanding sponge
set up the spoiler on a stand
applied 3 coats of clear
came back 3 hrs later to remove from the booth
-
quickly masked the edges to prevent scratching adjacent panels in the wet sand and buff process
skated 2000 grit to identify imperfections
shaved down the imperfection
LEFT FENDER
blocked the spots I shaved with 800 grit
blocked the 800 with 1200 grit
blocked the 1200 with 1500 grit
blocked the 1500 with 2000 grit
buzzed the fender with 2000 on the DA sander to soften the scratches
buzzed the fender with 2000 on the DA sander with an interface pad to even everything out
RIGHT FENDER
started blocking the spots I shaved with 800-grit
-
RIGHT FENDER
finished blocking the spots with 800
blocked the 800 with 1200 grit
blocked the 1200 with 1500grit
blocked the 1500 with 2000 grit
buzzed the fender with 2000 on the DA sander to soften the scratches
buzzed the fender with 2000 on the DA sander with an interface pad to even everything out
buzzed both fenders with 3000 trizact flat
buzzed both fenders with 3000 trizact on an interface pad to even out all the scratches
-
skated 2000 grit across the spoiler to identify the imperfections
shaved the imperfections
sanded the spots I shaved with 800 grit
sanded the 800 with 1200 grit
sanded the 1200 with 1500grit
sanded the 1500 with 2000grit
buzzed the spoiler with 2000 on the DA to even out all the scratches
buzzed the 2000 with 3000 trizact on the DA flat
buzzed the spoiler with 3000 trizact on the interface pad
buffed the spoiler with step 1
polished the spoiler with step 2 on the rotary buffer
polished the spoiler with step 2 on the random orbit polisher
buffed both fenders with step 1
started to polish the left fender with step 2 on the rotary buffer
-
finished polishing both fender with step 2 on the rotary buffer
went back and buffed a few rouge scratches with step 1
polished those areas with step 2 on the rotary buffer
polished both fender with step 2 on the random orbit polisher
blew off the dust
reinstalled both fog lights
reinstalled front bumper brackets
reinstalled front bumper
reinstalled the carbon spoiler
opened up hood and started to clean up the buffing residues
-
removed the masking that prevented the car from being caked in compound
the hood had a bunch of minor scratches that the vehicle came in with so we decided to fresh it up
buffed the hood and fender tops with a wool pad and step 1
buffed the hood and fender tops with a foam pad and step 1
polished the hood with step 2 on the Rotary buffer
polished the hood with step 2 on the random orbital buffer
blew off and wiped down the vehicle with a microfiber cloth to remove the compound residues
opened up all the jambs and wiped them down
touched up a couple of spots


